5 Ways I Made LibreOffice Comparable to Scrivener
I have never asked anyone “Which writing programs do you use?” I didn’t understand why this question needed to asking at all when all a writer needs is something to write on, right? Yes! But also no. When I began my writing journey, I had Microsoft Word, and when I bought my computer, I downloaded the very similar, and very free, LibreOffice. For over a decade I typed away on the word document without a thought about formatting, or outlining, or anything else besides the words I wanted on the page. At the time, that was fine with me, but I had seen that question asked so many times I thought there had to be something. There had to be something I was missing because Microsoft and LibreOffice weren’t the obvious answers; apparently, writing software like Scrivener and Ulysses were.
I perused a few of these programs to see what all the hullabaloo was about, and was excited to see its appeal immediately after reading it’s blog posts, FAQs, and watched tutorials on how to use them; however, my excitement was dashed when I thought about how little it would actually benefit me.
Keeping one big project in a neat and organized folder was something I already do with my documents on Mac. These programs’ lure for people, whom are looking into easier ways on how to write novels, is it’s visual appeal, and I don’t work with visuals. Mood boards, mind maps, relationship webs, index cards on a cork board . . . I never use these. Distraction-free writing? I can easily do that with making LibreOffice fullscreen. Want a dark background with a lighter font, or a different color scheme in general? LibreOffice does that too. So I knew without even starting the free trial that I would never use any of these programs to its fullest. It seemed like a total waste. Their character outlines, world building notes, and story outlining were also things that I also couldn’t see myself using because they didn’t have what I needed. Instead of likes and dislikes, I have hobbies and fears, and instead of listing individual psychological, behavioral, or personality traits, I write them out, giving more context behind these traits and when they act upon them so they aren’t just black or white. Yes, a majority of these writing software allow for customization, but that’s more work for every new project. Instead of opening a new project and getting started filling out the information, you first have to create or customize your templates (if the program even allows that).
For everyone that’s carrying a torch for these software, and is about to tell me how I’m wrong, that because I haven’t actually tried them I don’t know anything, let me say it’s great that it works for you, but I know in my bone marrow it’s not for me. It’s like trying to find a date online—you can tell if a person would not be a good fit for you just by looking at the profile. Even without sending that first message. These writing software are just not a good fit for me.
But it did give me something new to think about.
I knew I wanted something like these programs, but my way, with little to no hassle for every writing project. I went back to what I already had and was familiar with and dove deeper to see how I could make it behave more like these writing programs. In the process, I found five big ways that has changed the writing game for me. All without downloading plugins or extensions.
1. The Formatting Options
From what I saw on these software, their limited formatting options are the standardized toolbar that any website with a chat box has, from the absolutely-need-all-the-time bold, italics and underline; to the maybe-use-once-or-twice-in-a-novel increase indent or block-quote; to the rarely-if-ever-used-seriously-what-novel-needs-this? bullet-point and numbered list. Only a small number of these software has styles, such as headings or titles. It gave me the impression that these software are just a place to write out your drafts. Then, once you’re finished with your novel, you would export it to something more like LibreOffice to fine-tune the formatting to publishing standards.
I prefer to skip the import/export step. It also helps me not to worry about the formatting later when it’s the first step I do. I go to LibreOffice’s “Page” and “Paragraph” formats and set the specific measurements so that it follows those formats as I write the story.
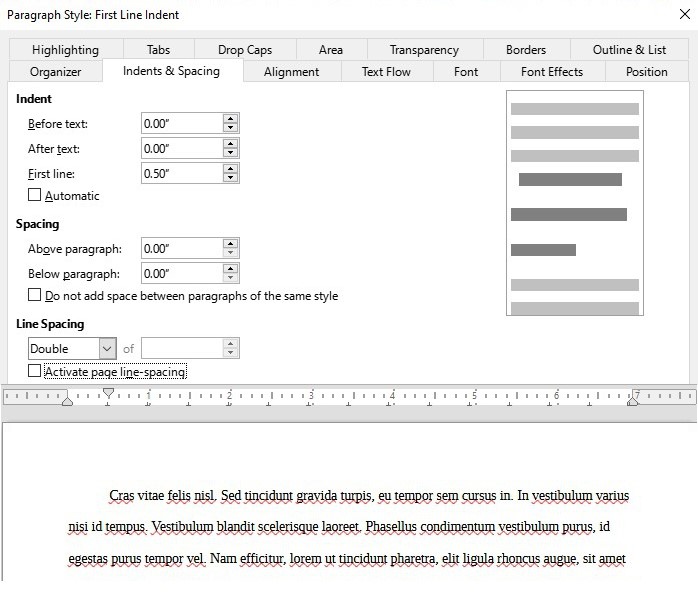
If I need to change the format of a small section, I can highlight those passages and change it right then and there. I would risk missing this section, or other sections, if I tried to format the story as the last step.
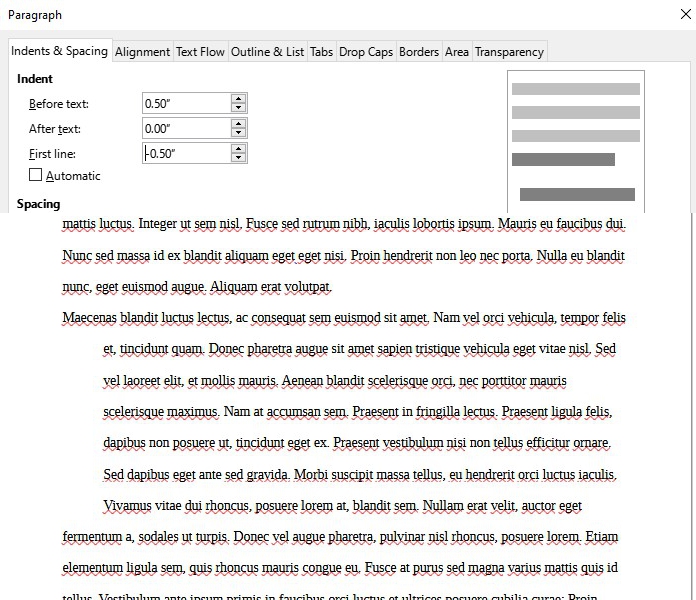
For example, I usually have the first line of every paragraph indented to half an inch so I don’t even need to hit the tab button, but let’s say during the story I wanted a small section of text to resemble a script, which means this section will have hanging paragraphs. Hanging paragraphs are the complete opposite of what you’re used to reading in novels, where instead of the first line being the only line indented in a paragraph, the first line takes up the entire width of the page, and the rest of the lines in that paragraph are indented. To do this, I would highlight this section, go to the Format, Paragraph, increase Before text to .50”, and decrease the first line indentation to -0.50” and increase the “after the first line” indentation to 0.50”. Voila! That little section in your entire novel has hanging paragraphs.
2. Making Your Own Template
The single one thing that I love are character outlines. I can work with the software’s notes on fantastical locations and the novel’s history, and I’ll give the plot outlines a shot, but if the character outlines don’t excite me, then I’ll more than likely not use it for long. One of the reasons I disliked the writing software is that there were few options for customization, and you’d have to add that to every location your story has, to every plot outline, and to every character in every project. That’s a lot of character outlines to change, and that is way too time-consuming to me.
I, at first, made my own character outline templates on LibreOffice, saved it as a document, and then I would “Save as . . .” whatever character the outline was for, and as much time as this did save, I would often save the character over my template. I would have to redo my template again, and again for as many times as I accidentally saved over it. Then I realized every time I opened LibreOffice, I saw “Templates” in the sidebar, which made me wonder how I could make my own. Turns out, it was easy to do.
Type it up, go to File, Templates, Save as Template, title your template, click My Template from the list, and save. Now if I need a character outline, I opened LibreOffice, choose the template, fill out the outline, and I can save the file without any worry of saving over the template. If I need to change the template itself? I make the changes to the template, save the template with the same file name, and click “yes” when it asks you if you want to save over the original template file.
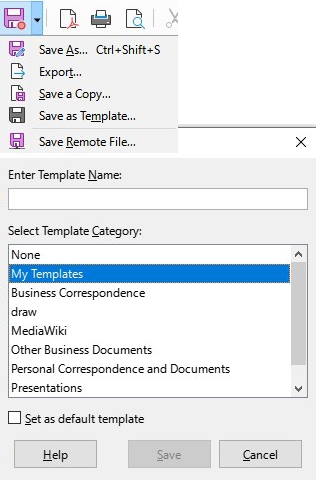
In addition to character outlines, you can create settings and location outlines, and just about whatever else you need. I even made a story draft template, complete with a title page, basic story information, and chapter pages ready to go.
3. Making More Templates!
You can call this a cheat, but now I want to gush on how I made my story outlining template using the LibreOffice Calc. You know . . . the software with the number-letter grid with an infinite amount of boxes, or cells, that mathematicians and statisticians use? While I have used this to calculate how much animal feed and farming seeds I would need to buy to complete the entire bulletin board in the School of Dragons game, I use this now for story outlining, which is not an original idea. J. K. Rowling does something similar on a piece of paper, and many other authors use Excel to keep track of scene lists.
In the first sheet, I have the first four steps of the Snowflake Method: the one-sentence story summary, the one-sentence story set-up, the simplified character summary, and the one-paragraph story set-up. Here’s the cool part! In some of the cells, I add in comments that pop up whenever my cursor hovers over the cell, reminding me what kind of information this step requires, with an example so I have a better understanding. I don’t need the comments anymore, but it’s there if I need to refer to it rather than going to the Snowflake Method website.
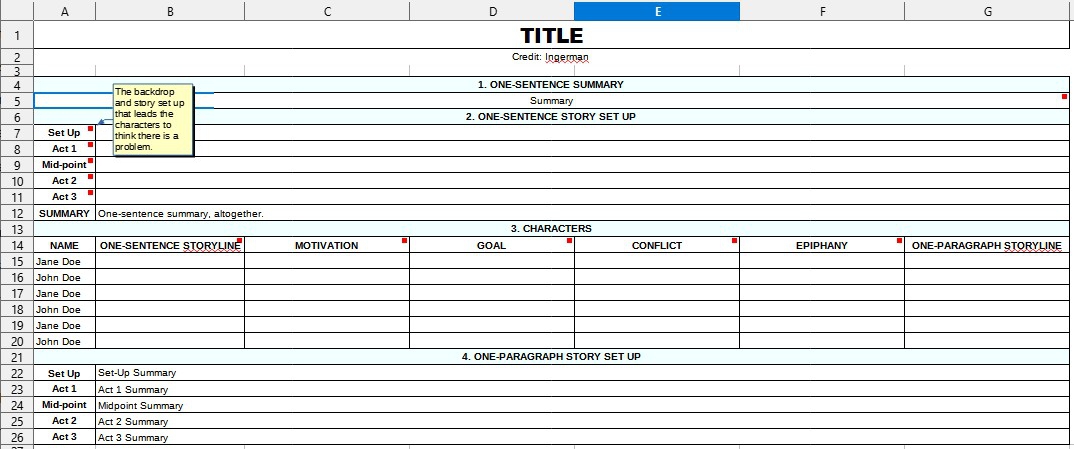
The next sheet has the next step with scene lists, that’s “supposed” to be one sentence. One sentence is usually not enough for me, but there are those rare occasions. I usually know which act the scene goes under, so I place them under which act. If I need more rows, I insert more rows. Or, you can delete the rows that indicate which act, and insert a column telling yourself which act this scene belongs under. After I feel I have enough scenes, I rearrange the cells in the order I want. I’ve had scene lists where all that was in a plain white cell was going to be in the open, but all the cells in a different color was the tone, or the hidden piece of information I wanted to show or hint at instead of tell. I still use this, but I integrate it when it’s especially important to remember. I don’t do this for every scene.
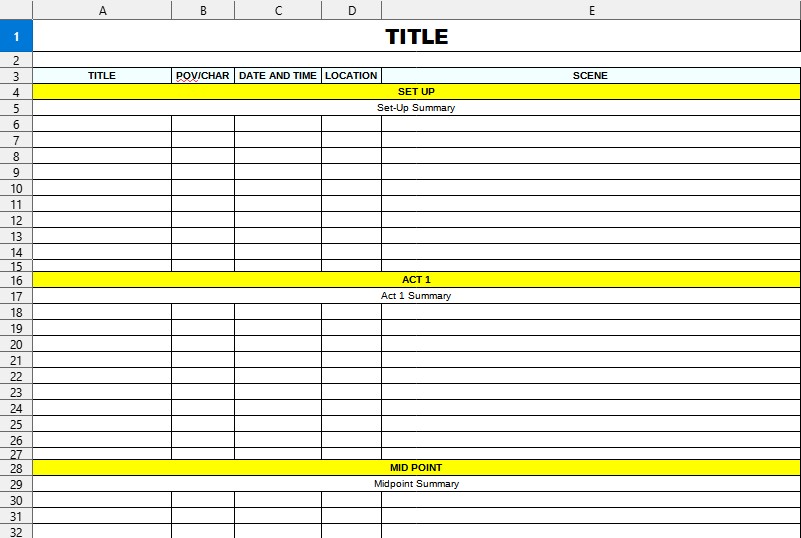
I don’t use the Calc for the next steps in the Snowflake Method because that would be better suited for Word. Calc isn’t used to write the actual story, it’s to get the basic ideas down, to skim, but I don’t usually use the Snowflake method after this point.
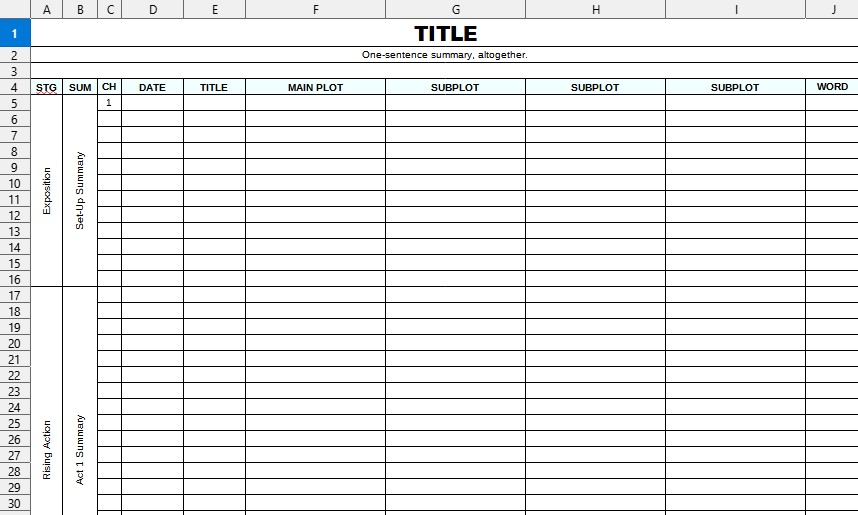
The next sheet is the plot grid where I organize all the scenes under its sub-plot. This helps me to see which sub-plot is lacking, and where I need to put in some foreshadowing. It also helps me know where the story is heading, so I don’t have any loose threads or plot-holes. That being said, I often don’t outline step-by-step in order. I fill out the outlines as they come. If I have a scene idea before I know one of my character’s motivations, I go to the second sheet with the scene list. If this one scene is begging for me to write it out, I do so on Word. If I need to start with the one-paragraph story set-up, and then condense that to the one-sentence story set-up, that’s OK too. The outline is there to get your ideas out no matter the order. And you don’t have to complete every little thing in a story outline for you to start writing your story.
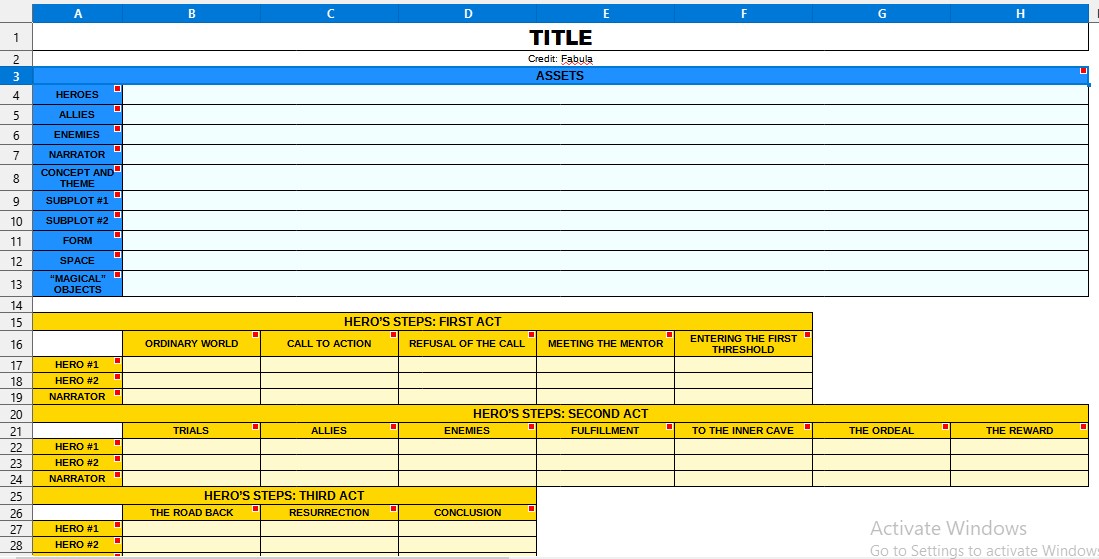
If the Snowflake Method doesn’t work for you, there are many other techniques out there. I’ve tried the Fabula technique in Calc too, but I couldn’t get past the story set-up cards . . .
but I also have templates for . . .
9 Block outlines, for telling stories in twenty-seven chapters,
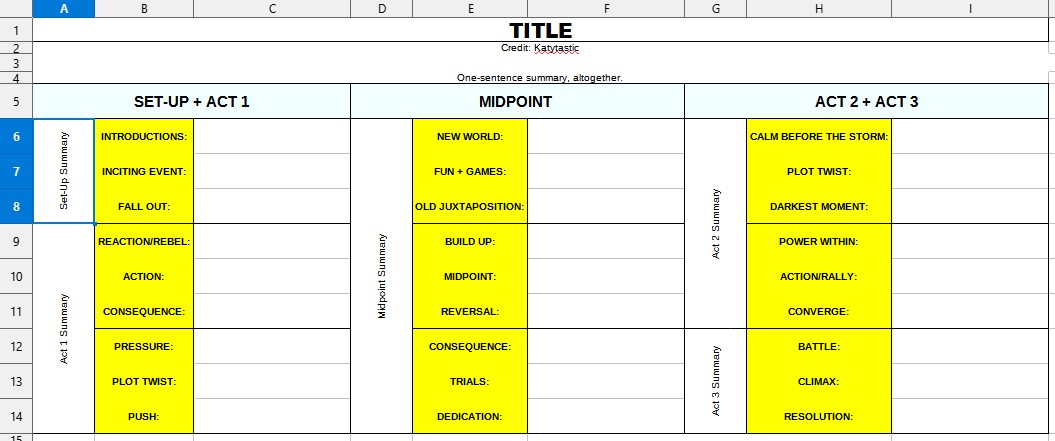
the Hero’s Journey,
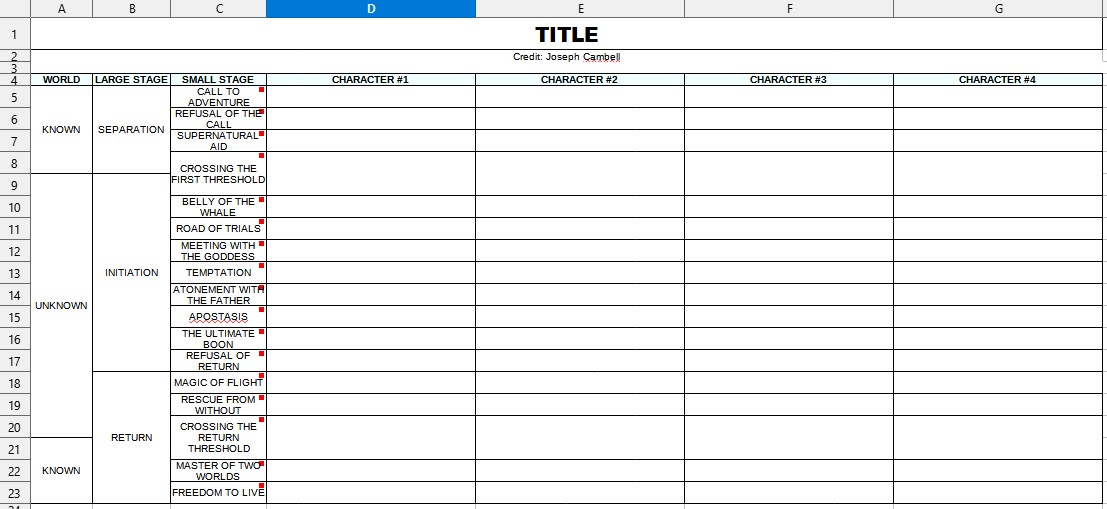
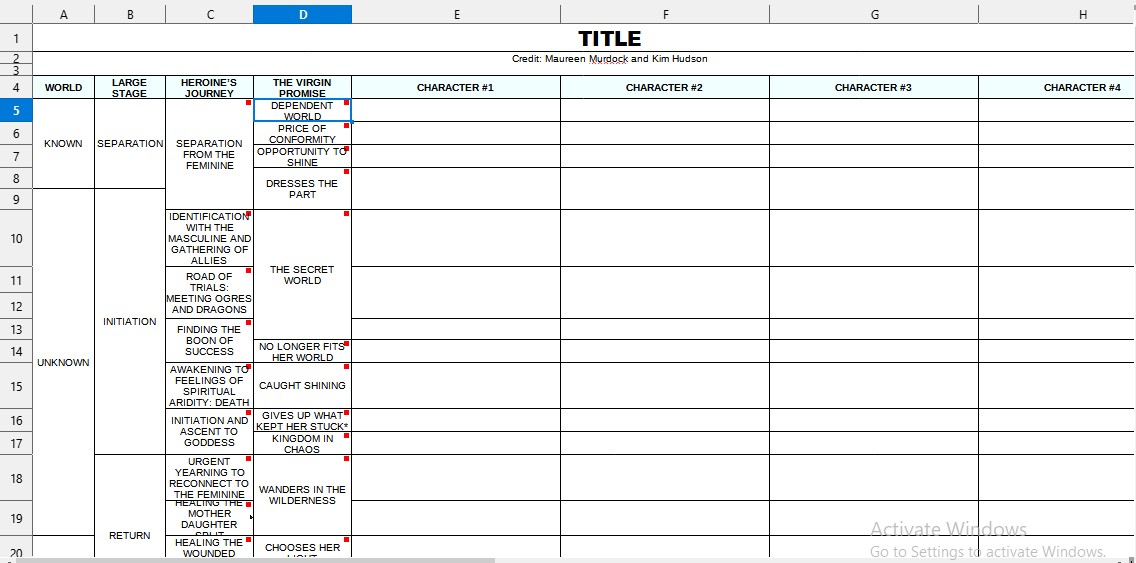
the Heroine’s Journey, for character growth and character arcs,
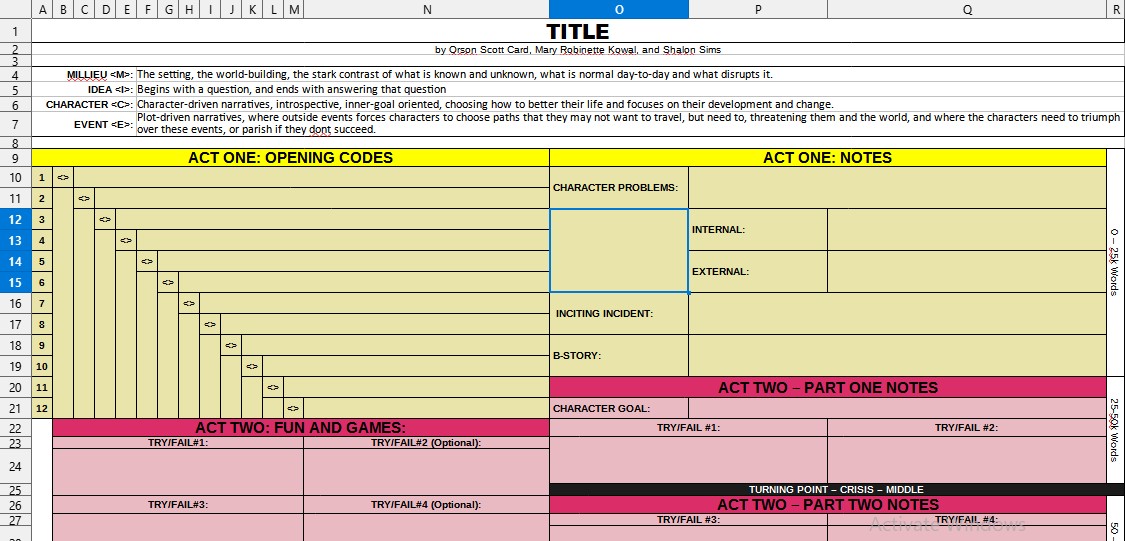
the MICE Quotient, for bringing a story’s end back to the beginning,
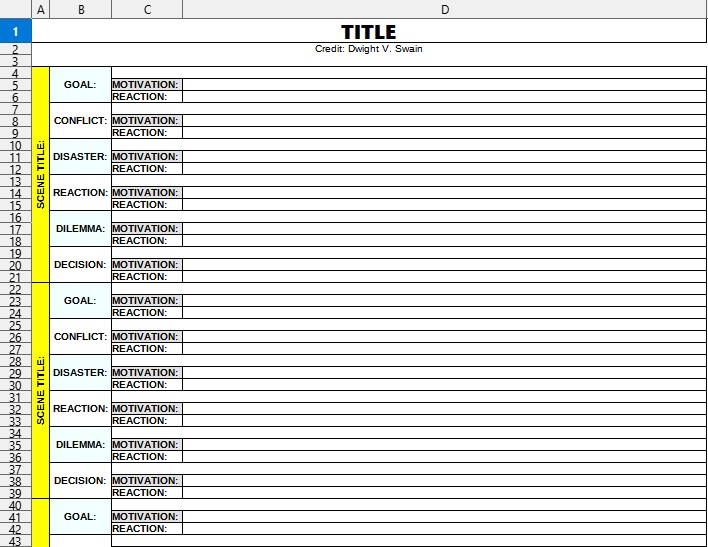
Swain’s scene breakdown if a scene I’m having trouble with needs some tinkering before continuing to write it,
and a timeline!
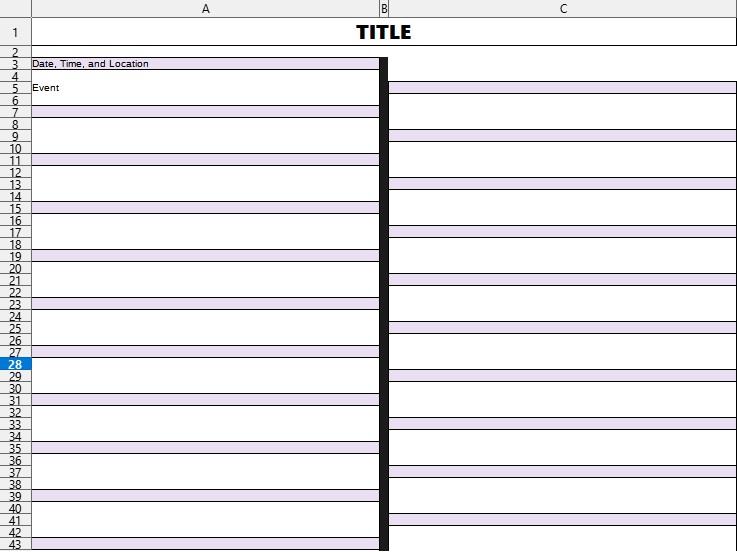
I don’t use all of these templates for every one of my stories, but if I feel one method just isn’t working for me for a story, I have other methods to try and twist my brain to force it to think about the story differently.
If you’re working on a series, instead of a stand alone book, you can keep these outlines all in one Calc Document by duplicating the sheets.
There is an infinite number of possibilities you can do with Calc.
4. The Navigation Tree
The one thing that I loved about a majority of these writing software was that all the research notes, the story outline, and the chapters (and scenes) were listed in a sidebar in folders and sub-folders. I could flip from a character’s outline to remind myself if her beauty mark was on her right or left nostril, and then click back to the chapter I would be working on with little to no fuss. This was the one thing I knew I needed, and I looked and scoured the web to find out how I could do this with LibreOffice. LibreOffice did have Organon, but it no longer works with the latest version of LibreOffice, so I had to find another way. I haven’t figured out how to keep my Calc and Word document as one document with that tree file sidebar, but I have gotten close enough for it to be satisfactory for me. It’s not perfect, but it’s good enough until I can find something better.
This goes back to my first point about formatting.
Before I started exploring LibreOffice, I didn’t see the point in the text “styles” such as the title, subtitle, headings 1, 2, 3 etc. when I could change the size and make it bold. These styles aren’t just to keep things consistent—did I make the sub-headings a size 15 or 20 font?—but it creates a sort of tag within the document that LibreOffice’s navigator in the sidebar keeps track of, creating it’s own tree file. Now I can flip to a character to see what those pesky eye colors are, and to specific chapters and/or scenes and back again with a simple click. And all in one document rather than each chapter being a separate document like I had been doing.
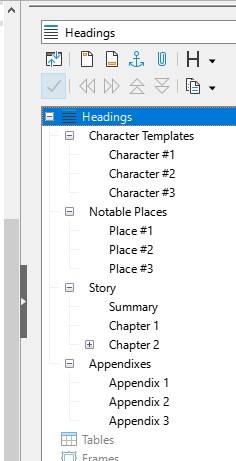
If you prefer to work with chapters separated, you can create a master document, insert text files as you complete chapters, and if you need to go back to reference something, you can go to your master document and click on what you need in the tree file column, or you can click “ctrl + F” to find it.
5. Inserting Comments
Ever had the thought “I know there’s a specific word for this situation, but I can’t think of it; however if I stop here to look for it, I’ll lose my writing flow on this scene”? Well, now you can insert a sort-of word, highlight it, and insert a comment reminding yourself that you wanted a different word, and then continue on with the scene without interrupting your pace. I insert comments letting myself know of what kind of changes I want to make for the next draft while I still write the current draft, but now the pressure to make those changes immediately aren’t there. I don’t feel the need to rewrite the story over from scratch when I hadn’t even completed my first draft.
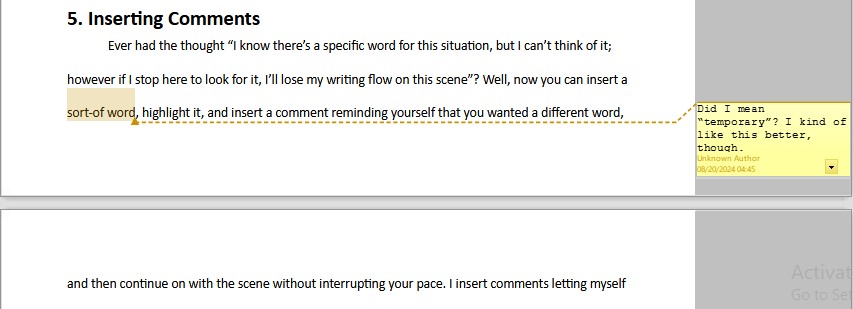
You know what these comments are also good for? Your betas and editors! LibreOffice has this feature called “Record Changes” so your editor can make these changes, and you can decide whether to accept these changes, which is neat, but I’m paying special attention to the comments because you can highlight questions and notes rather than having to refer to page 57 paragraph 6, and quote the passage in an email. They can give you line reactions, voicing their thoughts and concerns without changing the document.
I always say knowing how to figure things out for yourself will be better for you in the long-run rather than having the answer given to you. It makes your writing stronger with more practice if you know how to do it for yourself because you’ll make less of these mistakes in your next story projects. This is good for the first rounds of beta-ing when all you want is an emotional and opinion-based reaction. If a scene wasn’t working for them, they can insert a comment right there saying so, and you can figure out how to make it stronger. Plus, each comment is color-coded for each beta/editor so you can see if there are differing or similar reactions to the same scene.
If the comments are a distraction, you can turn them off. If you want to see one person’s comments, you can toggle to see that one person’s. If you’ve made the changes you want and are ready for the next round of beta-ing and editing, you can delete them all at once with only a few clicks.
I’m not knocking on Scrivener or people who use it. My point is that simplicity is better (for me). LibreOffice is what I’m familiar with, what I’m comfortable with, and I figured out how to make it work better for me. For me, I made it comparable to other writing software. So, yes, all you need is a writing document software, but, no, it isn’t as simple as typing up the story on Notepad and calling it good, especially if your aim is to publish a book.
So, for anyone else that feels some shame with not having one of these writing software, or has one but doesn’t use it, or has been told they are making excuses for choosing Microsoft Word or LibreOffice over Scrivener, don’t. As long as your story is being written, there shouldn’t be any shame. There shouldn’t be any pressure into acquiring one of these writing software if you feel you don’t need it, if something else works just as well for you.
Scrivener, Ulysses, and other writing software aren’t the magical unicorn of writing stories. You are your own unicorn who can find what works best for you, whether it be the five-star rated and touted Scrivener or the humble, not-Microsoft, LibreOffice.
Do you have any thoughts or questions on what you just read?
Send me an email to let me know!